Behind the Scenes: Fly Tying Video Setup
- Feb 1, 2022
- 4 min read
Shannon Messer
Fly fishing and fly tying content has exploded in recent years and even more so during the pandemic with many of us finding a bit of extra time on our hands. YouTube has made several people a lot of money however most of us do our best to make good content on a minimal budget without a financial return from YouTube. If you are like me disposable income is not an option for our household so we operate our video and photography on shoestring budgets. That means using what most of us already have, a smartphone and free editing software. I want to share some of the things that I have learned over the past few years that can help you take your videos to the next level.

During my hours of research, watching YouTube videos, I have learned that the most important element to viewers is quality audio. Think back to some of your favorite videos and I bet they have quality audio. Not everyone has the ability of Todd Moen of Catch Magazine but why can’t you strive to achieve the best audio by upgrading to an external mic for your smartphone or camera. In surveys of video viewers poor audio was the number one turnoff regardless it the content was good.
Personally I use two different setups for recording depending on the situation. One is a Movo lavalier microphone and the other is the Rode Rodemicro. By adding either one of these your current setup you will immediately set your video out from the others. You can find budget friendly options that will fit your needs the best. I will caution you that if you use a shotgun style microphone like the Rodemicro you will need a cold shoe mount to use on a tripod or phone case. Again you can find great products at affordable prices. A company such as Smallrig offers several options that are budget friendly so you can customize your setup.
I strongly believe that the vast majority of us are using our smartphones for recording. These devices are always with us and understanding how to use your smartphone with a few simple additions you can achieve DSLR camera quality for pennies on the dollar. I will be specifically referring to the Apple iPhone since that is what I have but research the items that I am using for Samsung.
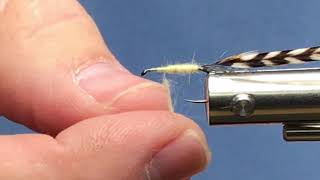
The camera on the iPhone is great but it has limits specifically with autofocus. I have the 11 ProMax meaning that I have zero experience with the latest models. The autofocus feature of the iPhone can have issues with zoomed in details and you will find the camera struggling to maintain focus perhaps while you are tying in a feather or other material. Often the camera will focus on your hand and blur the fly you are demonstrating. The best solution that I have found is an app called Filmic Pro. With Filmic Pro you will get the best of both worlds, DSLR controls with massive financial savings. This app will turn your compatible smartphone into an amazing DSLR which gives your control over focus, exposure, and audio thus making your videos instantly next level quality. Also the Filmic Pro App allows clean HDMI output. I use this feature for projection to a large monitor while doing presentations. It is amazing the difference it makes. The key is learning how to use all the features to maximize your content.
My next tip is to use variable ND Filters. ND Filters give you control over the amount of light the camera sensor is picking up. These work best with a DSLR setup or the Filmic Pro app. I recommend Polar Pro Light Chaser products. I have the phone case for the iPhone and the filters attach directly to the phone case giving your zero bulk instant control of your photos and videos. Plus you can get a grip for your phone that has a cold shoe attachment that works well with any other items you want to attach to your smartphone so you can take the quality to the next level.
Lighting and backgrounds are key for great looking video. Think about the shirt you will be wearing and how it contrast with your subject as it appears in the foreground. I have found that using an adjustable ring light you will have better control over light and shadows. Once again these are very budget friendly now with several options on the market. The goal is not to have your vise or hands reflecting light directly at the camera blinding the viewers.

Editing does not have to be that difficult. I am a firm believer that less is more. Use what you have and know well versus using an expensive editing software and not knowing how to use it correctly. I know that great programs exist but I still us iMovie on the iMac. I am comfortable using the controls and it’s easy which saves time. Surprisingly most of these programs have great features if you take the time to learn how to use them.
Keep in mind that quality tripods keep your camera stable but I am leaving this one to you. I hope that this will help answer some questions on my setup and maybe give you a few ideas for yours.